Hexo是简单易用的网络框架,可以直接从Markdown文件生成静态网页,本文为使用Hexo+GitPages搭建个人博客的简单记录。
搭建Git Pages
在Github上创建一个与用户名相同的仓库,这个仓库会作为博客的源文件仓库,不包含生成的静态网页,通过GitHub Action构建网页。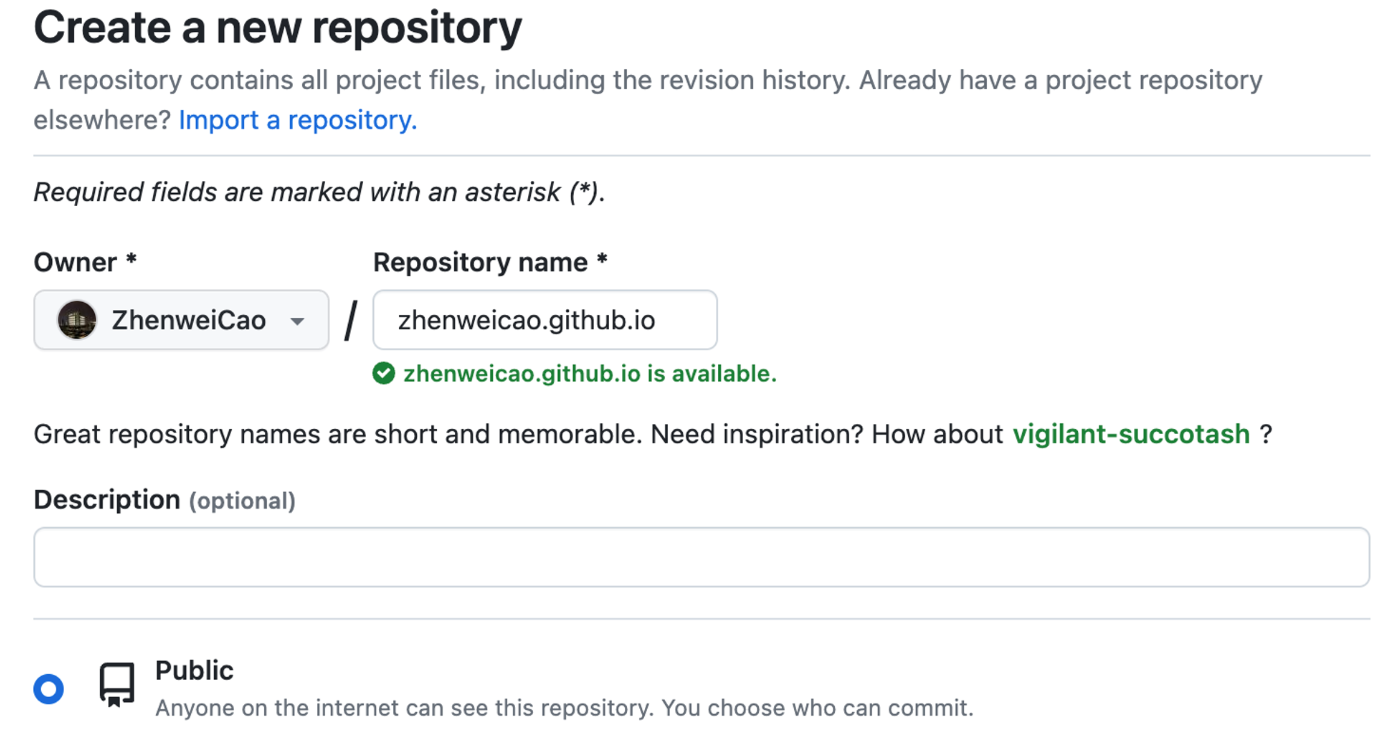
自定义域名
在GitHub的个人账户设置的Pages选项中,验证自定义域名,在域名解析的服务商里,设置对应的解析值。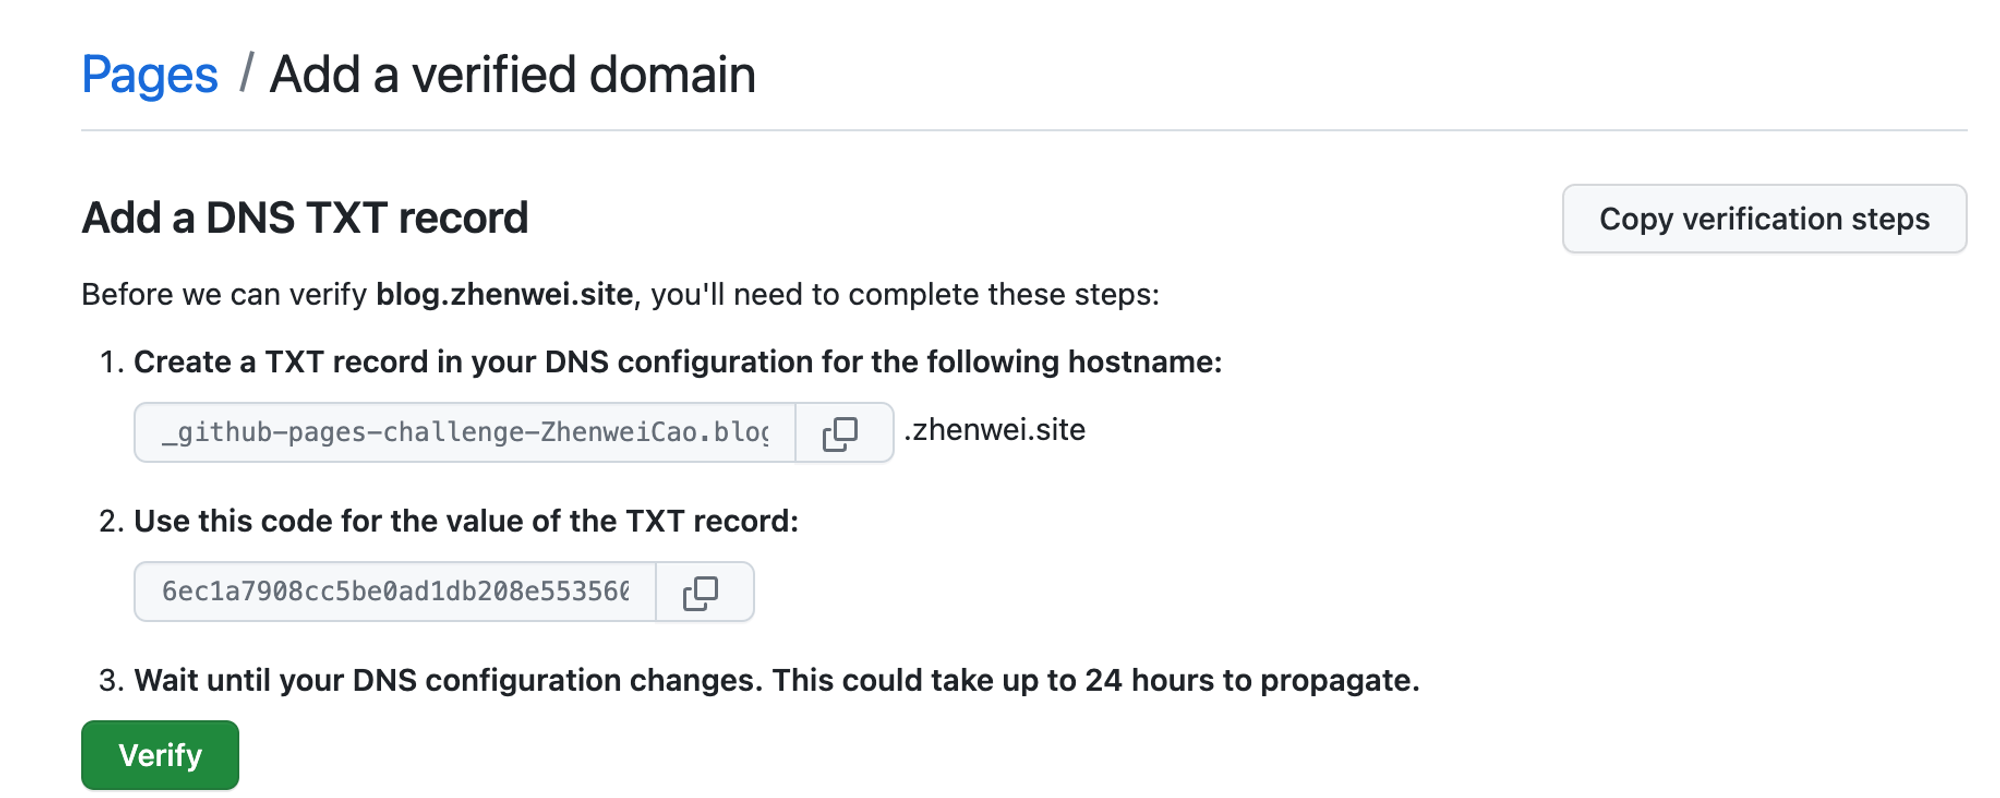
在此仓库的Pages选项中,添加自的域名,勾选Enforce HTTPS,选择从GitHub Actions构建。后续添加workflow之后,会自动根据源代码生成静态网页,部署到Github提供的服务器上。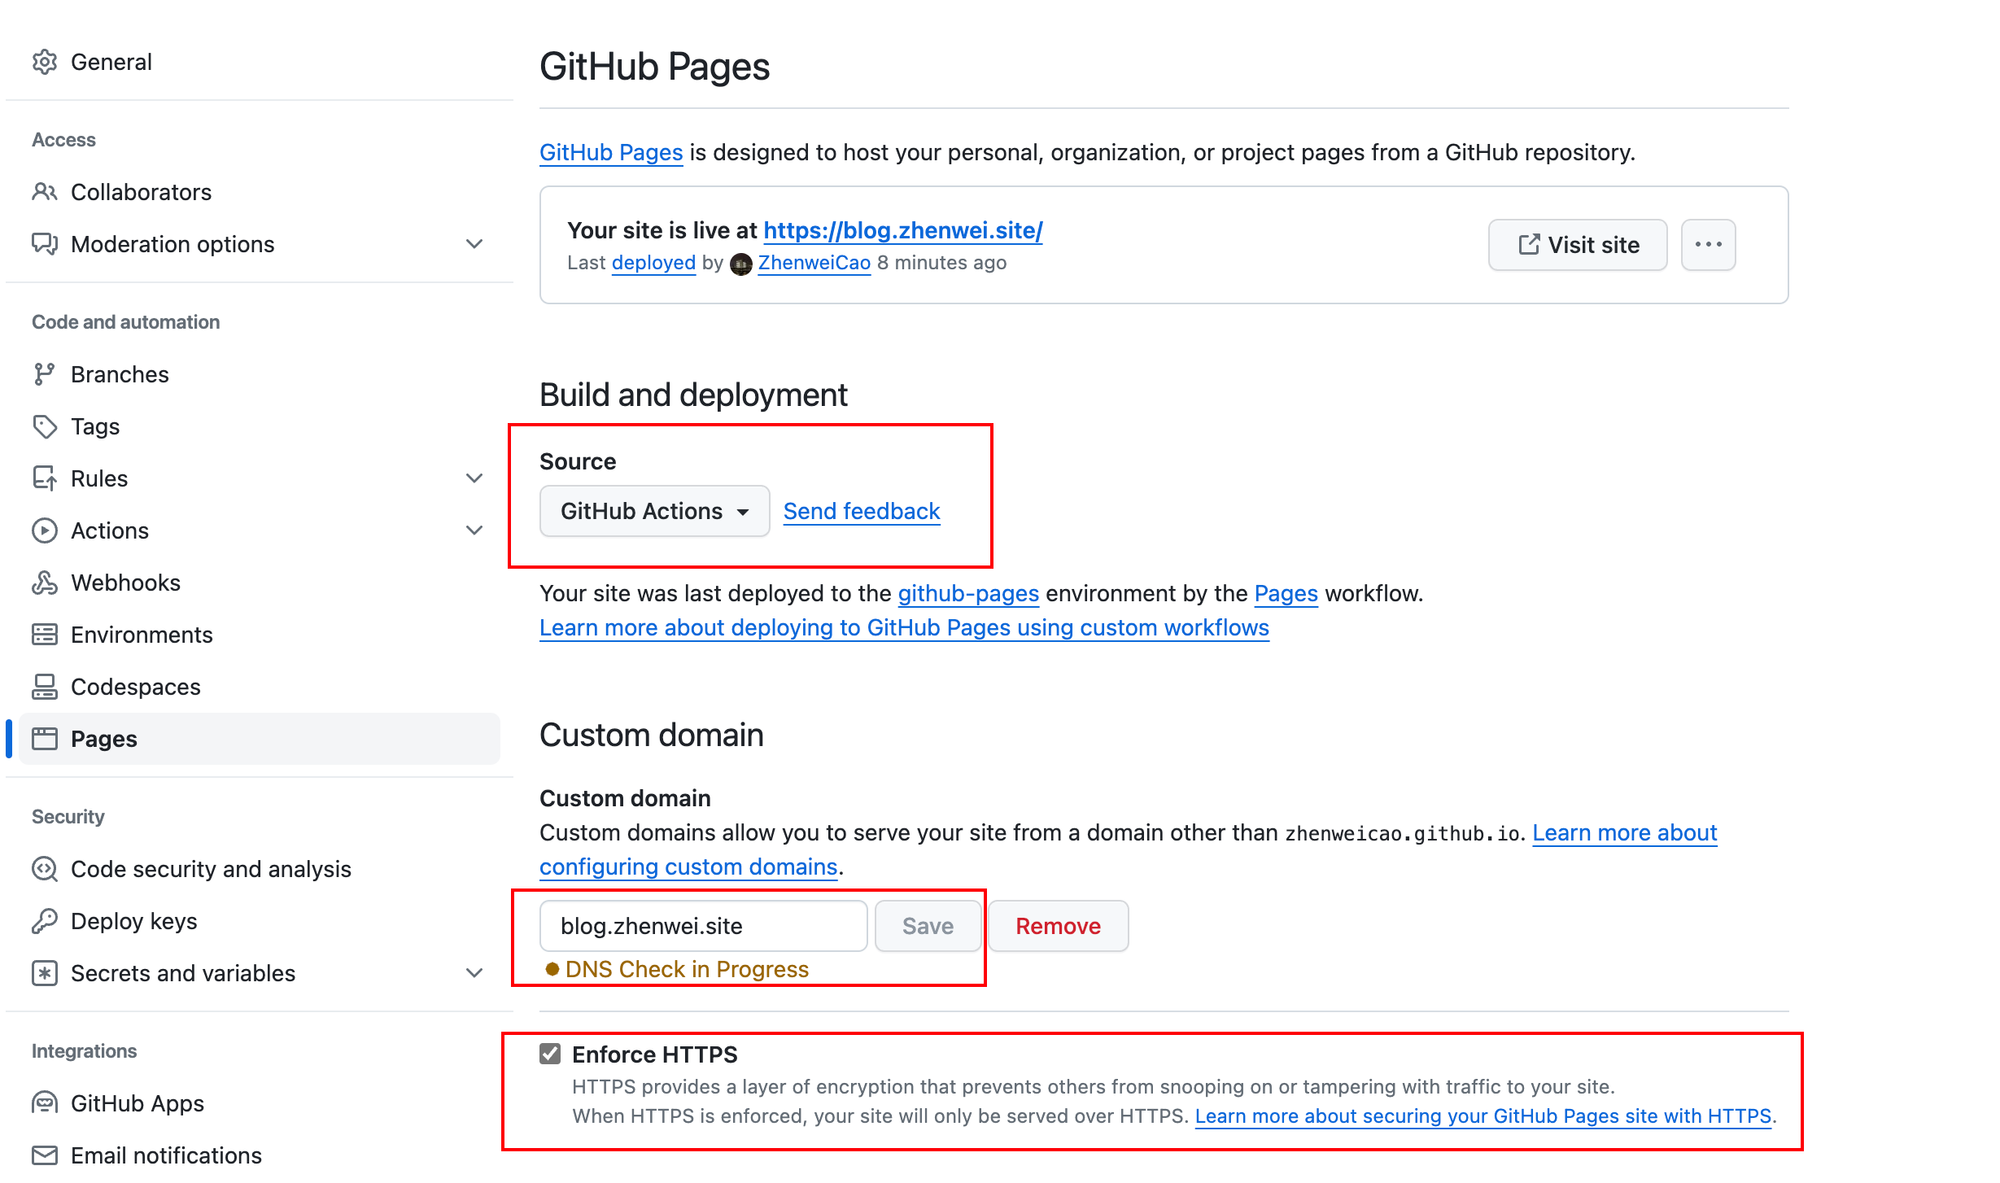
在域名解析记录中添加TXT记录,同时增加cname解析,记录值为指定的git pages地址。
本地搭建Hexo环境
安装环境
本地预览需要先安装node.js环境,通过npm安装hexo
brew install node
npm i hexo-cli -g
npm i hexo-deployer-git  # 安装部署插件
安装各种主题常用的hexo插件
npm install hexo-generator-search --save
npm i hexo-permalink-pinyin --save
npm i --save hexo-wordcount
npm install hexo-filter-github-emojis --save
npm install hexo-generator-feed --save
初始化
初始化一个hexo根目录(必须为空目录)
# 创建新的目录,作为静态网页的主目录
hexo init zhenweicao.github.io
进入此目录,然后初始化git环境
cd zhenweicao.github.io
git init
# 添加远程仓库
git remote add origin [email protected]:ZhenweiCao/zhenweicao.github.io.git参考的.gitignore文件
.DS_Store
.obsidian/
Thumbs.db
db.json
*.log
node_modules/
public/
.deploy*/
_multiconfig.yml
更换主题
这里采用的hexo主题为matery,在GitHub上先fork一下,方便保存后续自定义修改的配置
# 在hexo根目录下创建themes目录,用于保存主题
mkdir themes && cd themes
git clone [email protected]:ZhenweiCao/hexo-theme-matery.git  # clone自己fork的仓库

# 为主题添加submodule
cd .. && git submodule add [email protected]:ZhenweiCao/hexo-theme-matery.git themes/hexo-theme-matery  # 设置成自己fork的主题仓库
修改hexo根目录下_config.yml配置文件,修改默认主题、域名和git仓库地址
theme: hexo-theme-matery  # 修改默认主题
url: http://blog.zhenwei.site  # 或者自定义的域名

deploy:
  type: 'git'
  # 修改为仓库地址
  repo: https://github.com/ZhenweiCao/zhenweicao.github.io.git
branch: main # 从main分支构建生成静态网页matery主题代码高亮在7.0.0版本的hexo中目前存在一些问题,需要修改hexo根目录下_config.yml,
syntax_highlighter: prismjs
highlight:
  enable: false
  line_number: true
  auto_detect: false
  tab_replace: ''
  wrap: true
  hljs: false
prismjs:
  enable: true
  preprocess: true
  line_number: true
  tab_replace: ''
修改主题
主题的修改需要参考源blinkfox/hexo-theme-matery
增加网站页面
hexo new page "categories"
hexo new page "tags"
hexo new page "about"
hexo new page "about"
hexo new page "friends"
会在hexo根目录下source自目录生成的对应的index.md文件,修改文件属性
---
title: categories
date: 2018-09-30 17:25:30
type: "categories"
layout: "categories"

# for tags/[[contact/index|index]].md
# type: "tags"
# layout: "tags"

# for about/[[contact/index|index]].md
# type: "about"
# layout: "about"

# for contact/[[contact/index|index]].md
# type: "contact"
# layout: "contact"

# for friends/[[contact/index|index]].md
# type: "friends"
# layout: "friends"
---
修改模版
修改hexo根目录下/scaffolds/post.md,这样每次创建新post时就会自动填充预设信息,其他则类似
---
title: {{ title }}
date: {{ date }}
top: false
cover: false
mathjax: true
summary:
tags:
	- tag1
	- tag2
categories:
---
写作
本地常用命令如下
hexo new "My New Post"  # 创建新的post,会自动根据模版添加文件信息
hexo clean  # 清空缓存
hexo generate  # 生成静态网页
hexo service  # 本地启动hexo服务,默认监听4000端口
More info: Writing
图床
使用PicGo和腾讯云Cloud Object Service (COS)存储图片,具体可以参考对象存储 使用 PicGo+Typora+COS 搭建图床服务-最佳实践-文档中心-腾讯云 (tencent.com)
Markdown
本地可以使用Obsidian或者vscode编辑markdown文件。在source/_posts增加新的markdown文件,后通过git push到Github远程仓库即可添加新内容。
构建workflow
在项目根目录.github/workflows/pages.yml修改为以下内容,注意修改node.js为本地版本
name: Pages

on:
  push:
    branches:
      - main # default branch

jobs:
  build:
    runs-on: ubuntu-latest
    steps:
      - uses: actions/checkout@v3
        with:
          token: ${{ secrets.GITHUB_TOKEN }}
          # If your repository depends on submodule, please see: https://github.com/actions/checkout
          submodules: recursive
      - name: Use Node.js 21.x # 修改对应版本
        uses: actions/setup-node@v2
        with:
          node-version: '16'
      - name: Cache NPM dependencies
        uses: actions/cache@v2
        with:
          path: node_modules
          key: ${{ runner.OS }}-npm-cache
          restore-keys: |
            ${{ runner.OS }}-npm-cache
      - name: Install Dependencies
        run: npm install
      - name: Build
        run: npm run build
      - name: Upload Pages artifact
        uses: actions/upload-pages-artifact@v2
        with:
          path: ./public
  deploy:
    needs: build
    permissions:
      pages: write
      id-token: write
    environment:
      name: github-pages
      url: ${{ steps.deployment.outputs.page_url }}
    runs-on: ubuntu-latest
    steps:
      - name: Deploy to GitHub Pages
        id: deployment
        uses: actions/deploy-pages@v2
遇到的问题
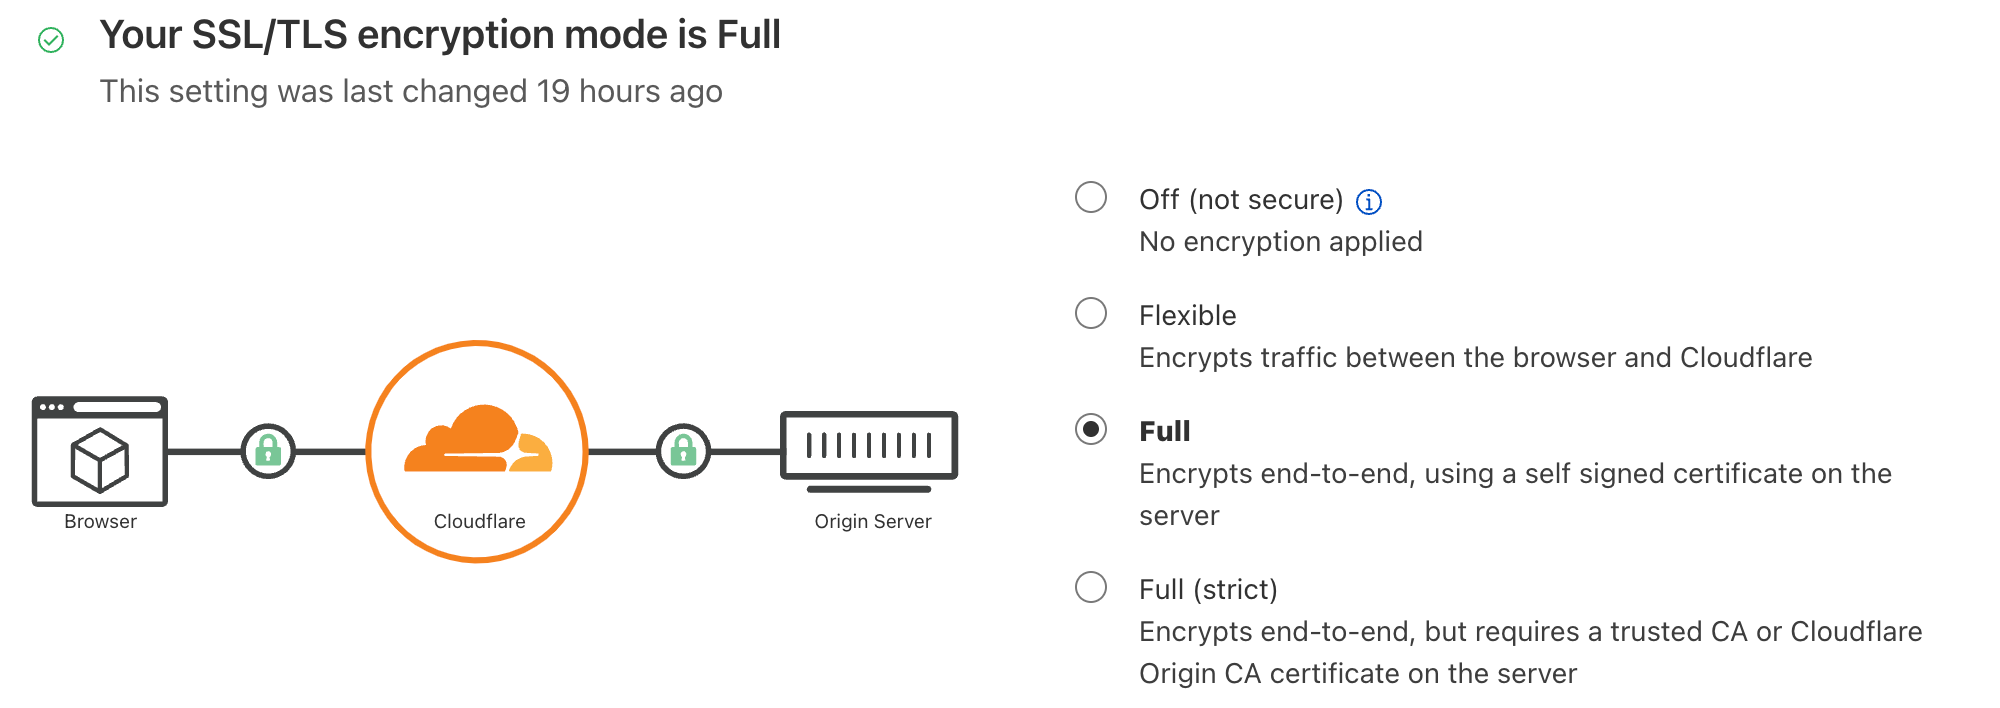
重定向次数过多
Git Pages中勾选了Enforce HTTPS,会将对HTTP的访问重定向到HTTPS,因此,在CloudFlare中设置解析时,需要将SSL加密模式勾选为Full,或者取消勾选Git Pages的HTTPS选项(当为Flexible时,CloudFlare会使用HTTP访问Origina Server,然后这个HTTP访问又回被重定向到HTTPS,导致循环,产生重定向次数过多的错误)。